


March 14, 2022
Ready to get started? Follow our step-by-step guide to create your ad campaign on the FRAMEN Ads Manager.
Table of contents
Before you create an ad, it's vital to know exactly who your target audience is. Selecting the right audience is essential for targeting your ad campaign with FRAMEN.
Campaign setup
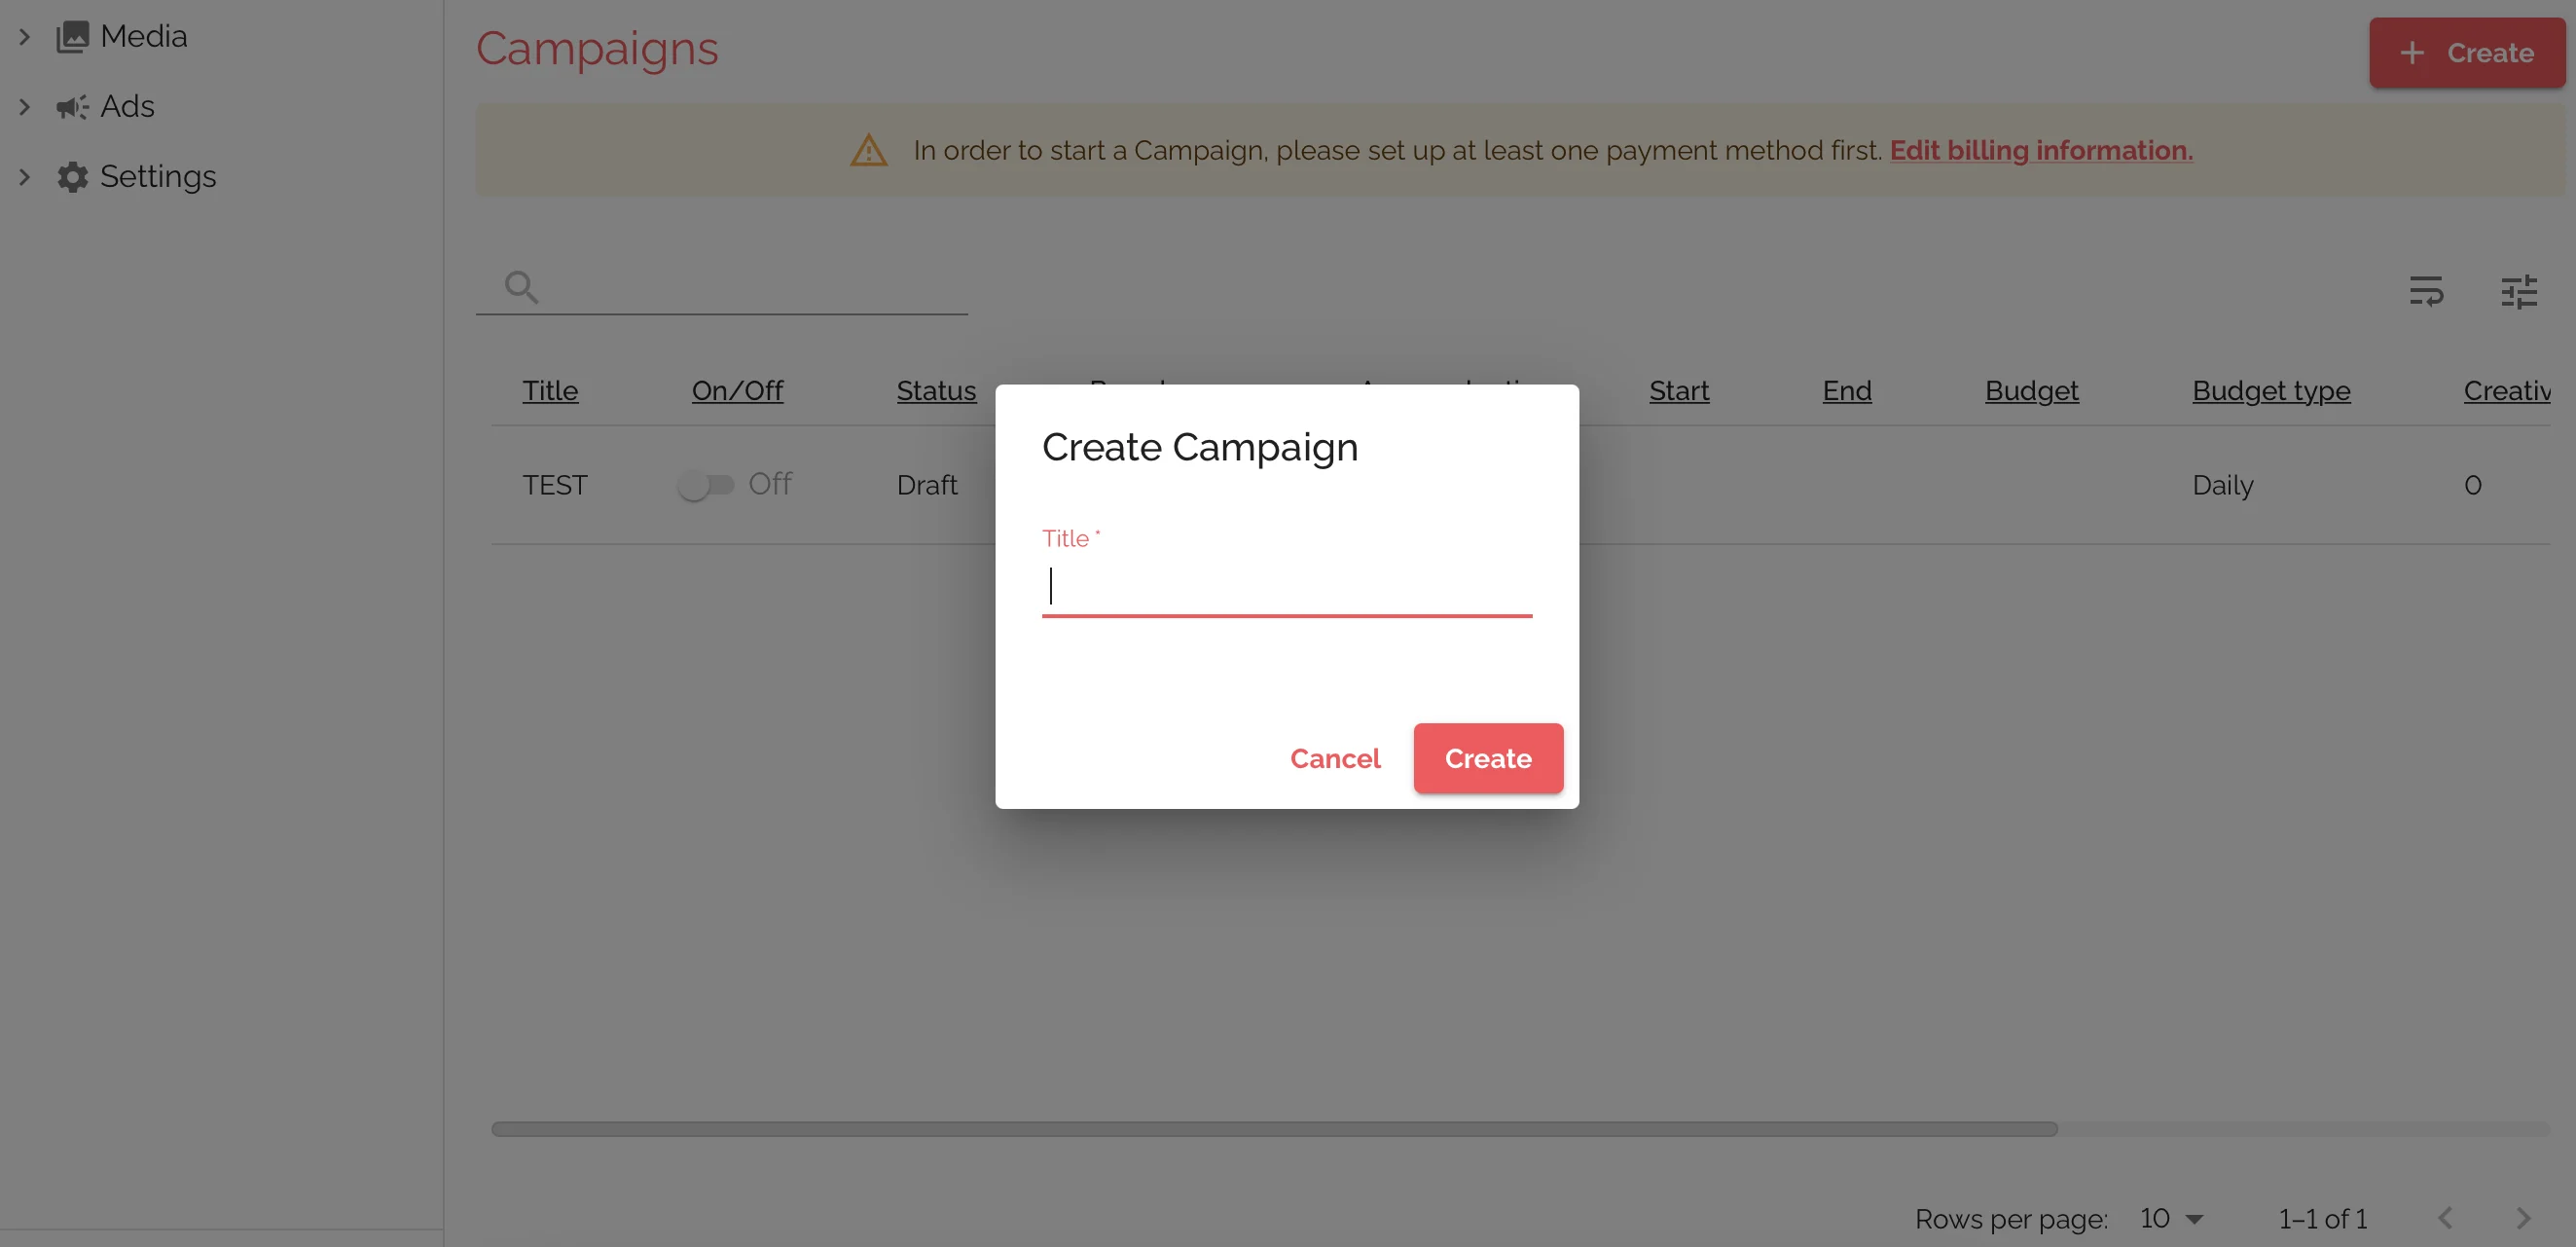
To get started with your FRAMEN campaign on the FRAMEN dashboard, click on Ads - Campaigns - Create and enter a title for your campaign.
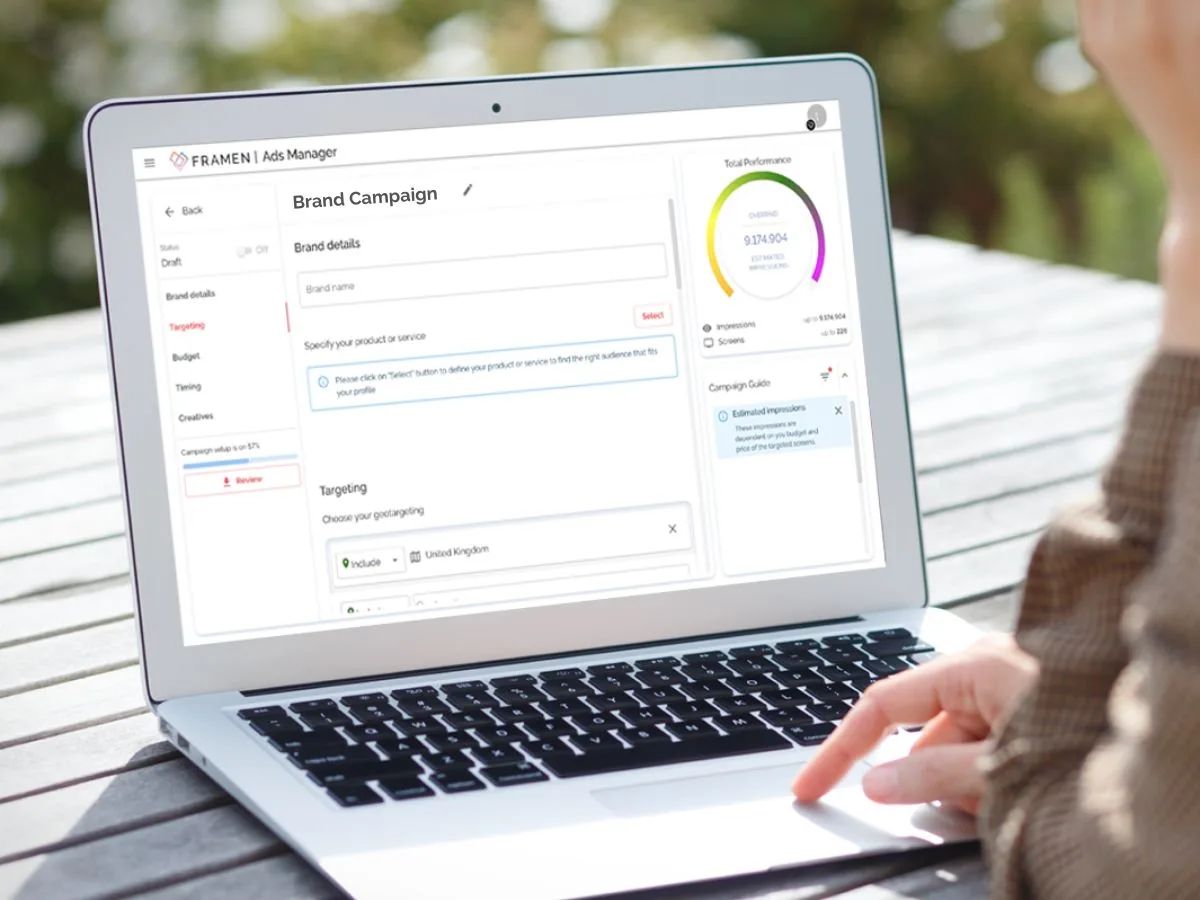
To help the FRAMEN algorithm determine the right audience for your business, the first step is to fill in your business details. Enter your brand’s name, then specify your product or service. Select the specifications that best suit your product.
Targeting
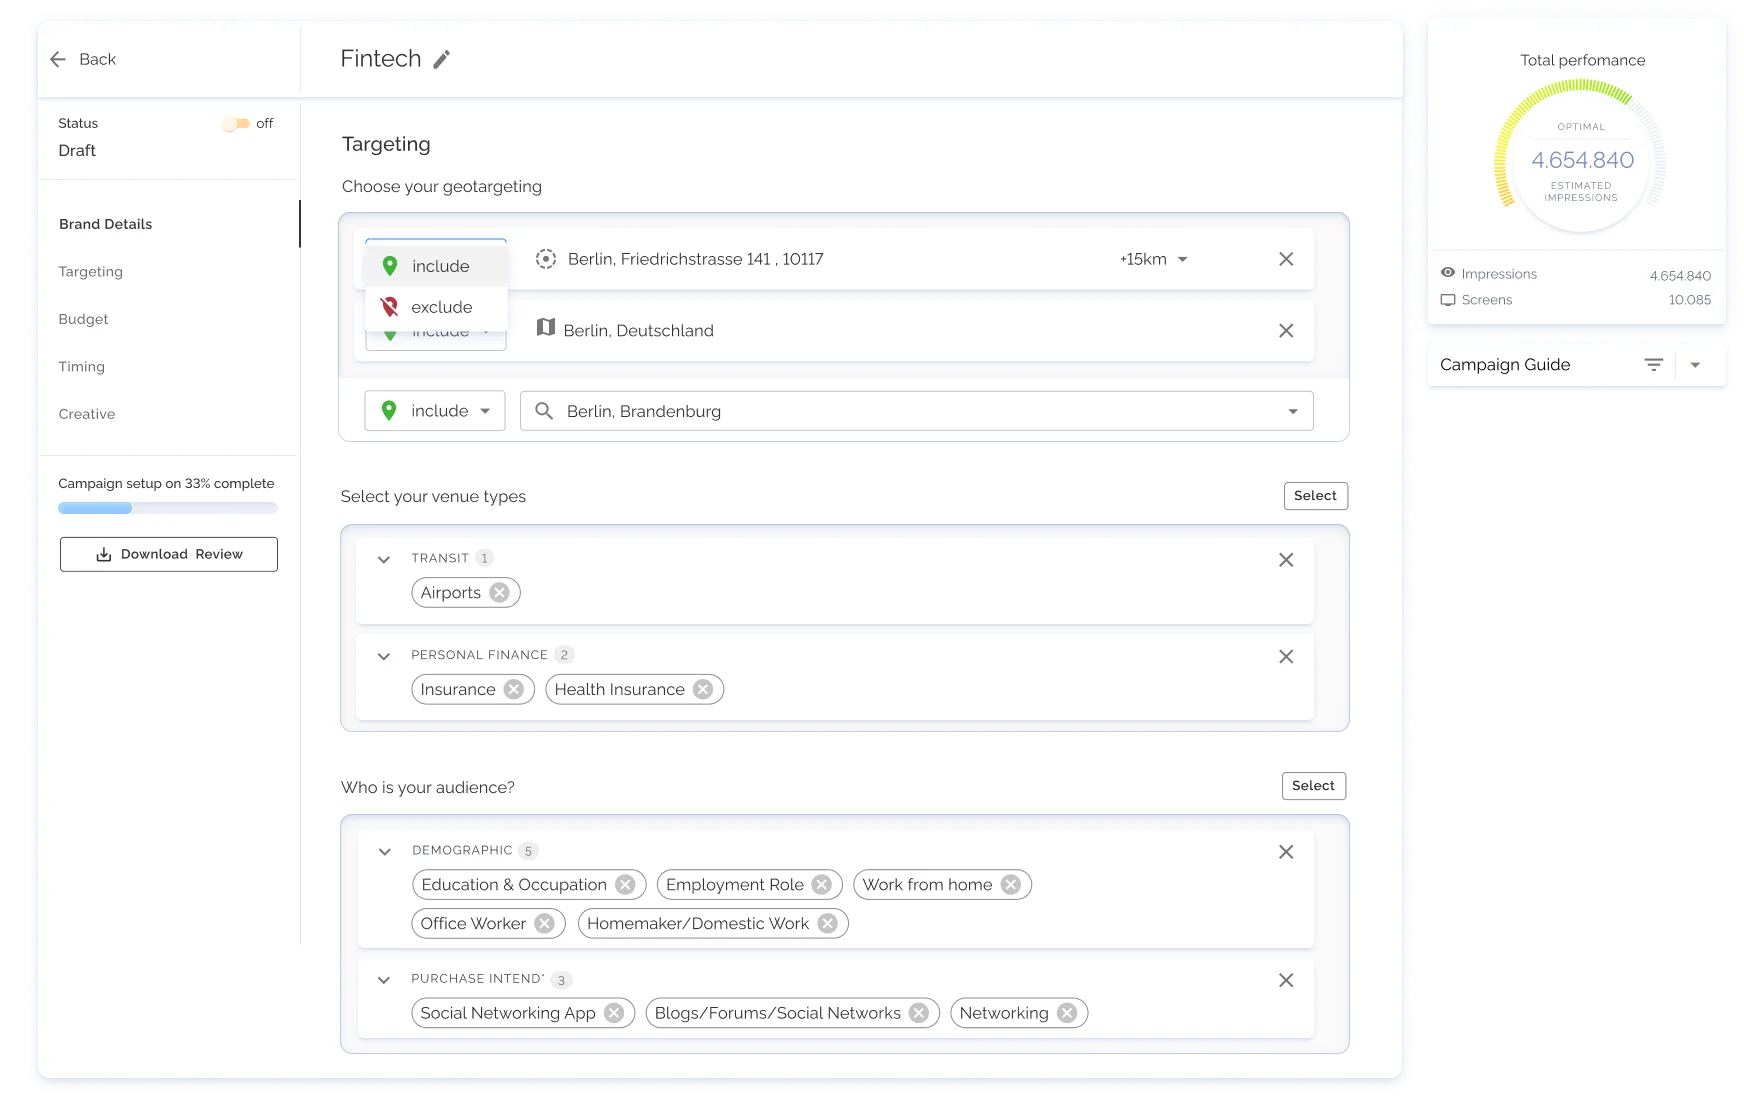
The targeting parameters you select affect the estimated impressions and reach you can expect to receive for your campaign - you’ll see this displayed in the performance indicator. Targeting is the best way to narrow down the most suitable customers for your business.
In this section of your dashboard, you can target your audience based on countries, specific locations and venue types such as coworking spaces or gyms. You can also define your target audience based on interest groups or demographics.
You can also choose to geotarget your audience by specifying the countries of your choice or include/ exclude specific regions. See the example below.
Countries
Imagine your brand operates internationally and you want to advertise in London, Berlin and Paris. You can not only include specific locations of London like Canary Wharf (the business district), but you could exclude locations like Staines (a suburb near London).
Another example is one of our real-life clients, Uber, the famous global taxi app chose to target big cities and metropolitan areas where not everyone owns a car.
- By default, the geotargeting function for a campaign is set to Global.
- Click on the Countries dropdown to select the countries where you want your ad displayed.
- You can select a maximum of five countries or choose to go live with a global campaign.
- When selecting multiple countries or opting for the global campaign option, you should be aware of the potential differences in the legal restrictions and languages.
Location
Depending on the aim of your campaign, a different kind of targeting might be suitable for your brand’s needs.
- You can choose to include a location by clicking on Include, and select a Location and enter a radius to include.
- You can choose to exclude a location by clicking on Exclude, and select a Location and radius to exclude.
- The radius for geotargeting is calculated from the centre of the selected locations.
Venues
Let’s get more specific with our locations for our taxi app example. You can target by the venue type, for example: airports, (your ride home), retail (if you have a few more bags to carry than you anticipated), leisure (maybe you had a drink or two) and you will see the results for impressions and screens reflected in your reports.
- To target by venue type, select the type of venues where you would like your ad to be displayed in.
- Click on the search bar to search for relevant venue types.
- Hit Save.
Interests & demographic groups
Let’s use another example here, imagine you’re a luxury tour operator or travel agency. Who are you trying to reach?
Select Demographics: age range 30-60 (best earners), higher education, employment role work from home, director, professional, retired, income (remove anyone making under 50k as you’re a luxury brand).
Consider, what is the interest of our high earner, big spender audience?
Select Interests: Automotive, Business & Finance, Fine Art, Food & Drink, Personal Finance, Pop Culture, Real Estate, Shopping, Style & Fashion, Technology & Computing, Travel.
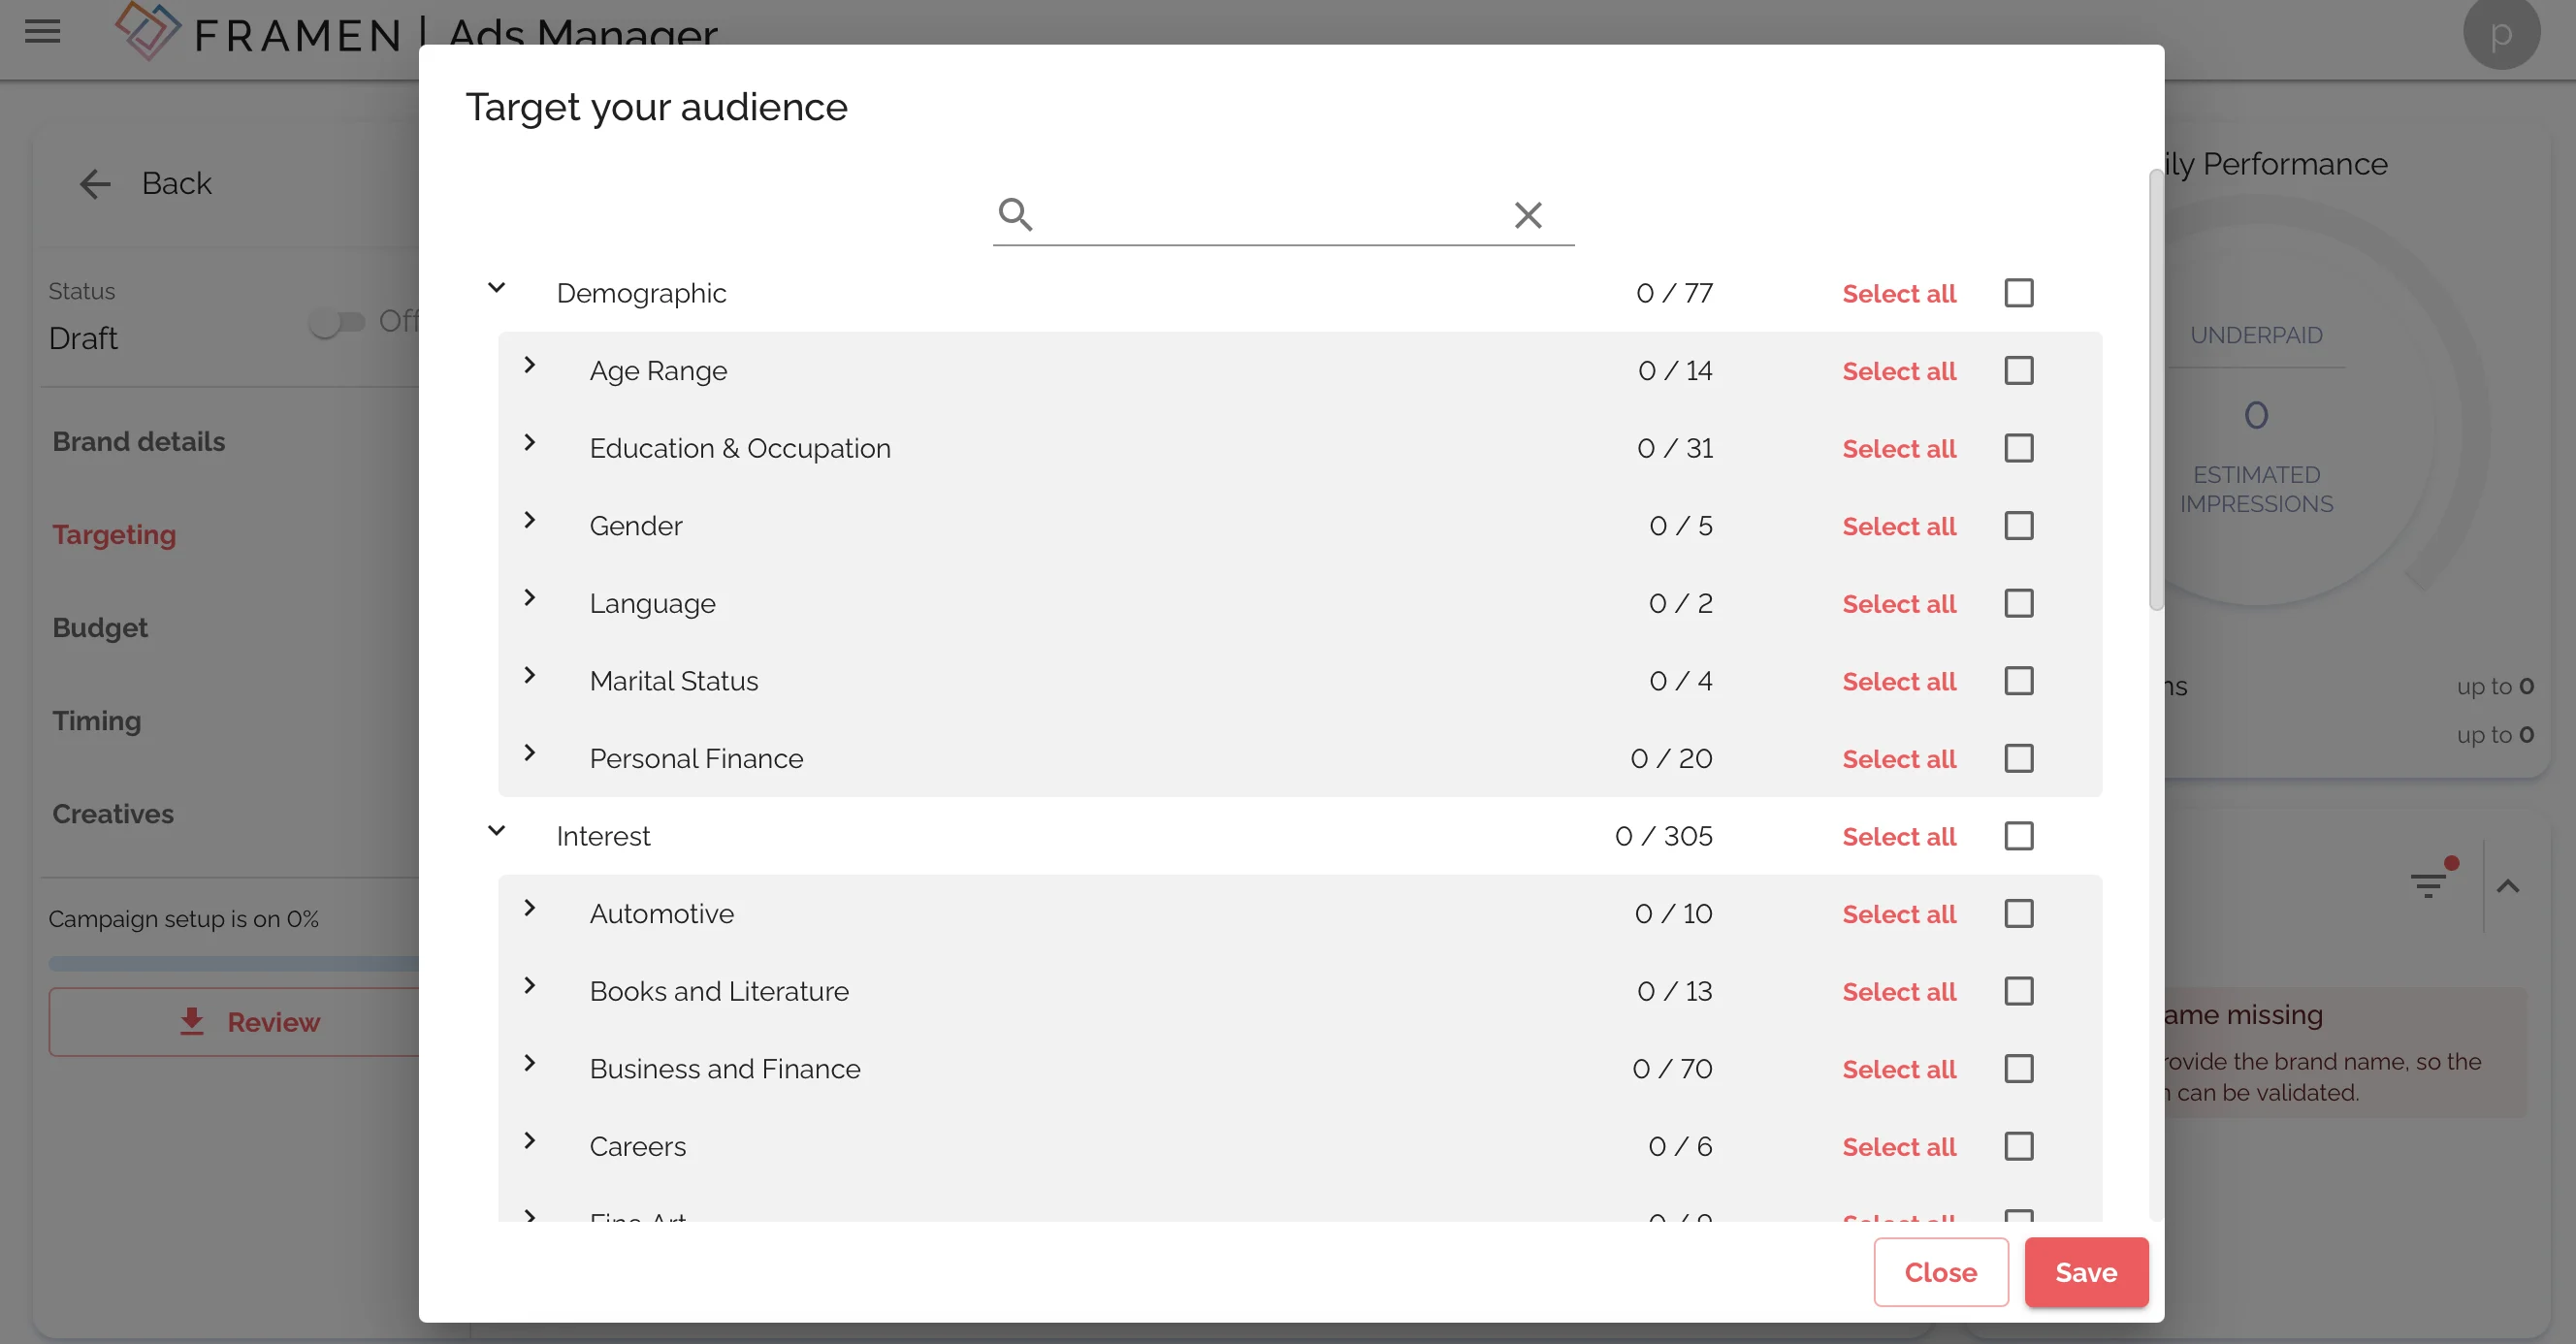
- To narrow down your audience by demographics or interest groups, click on Select under Target your audience.
- Select attributes for your target audience based on demographics, interests or both.
- Hit Save.
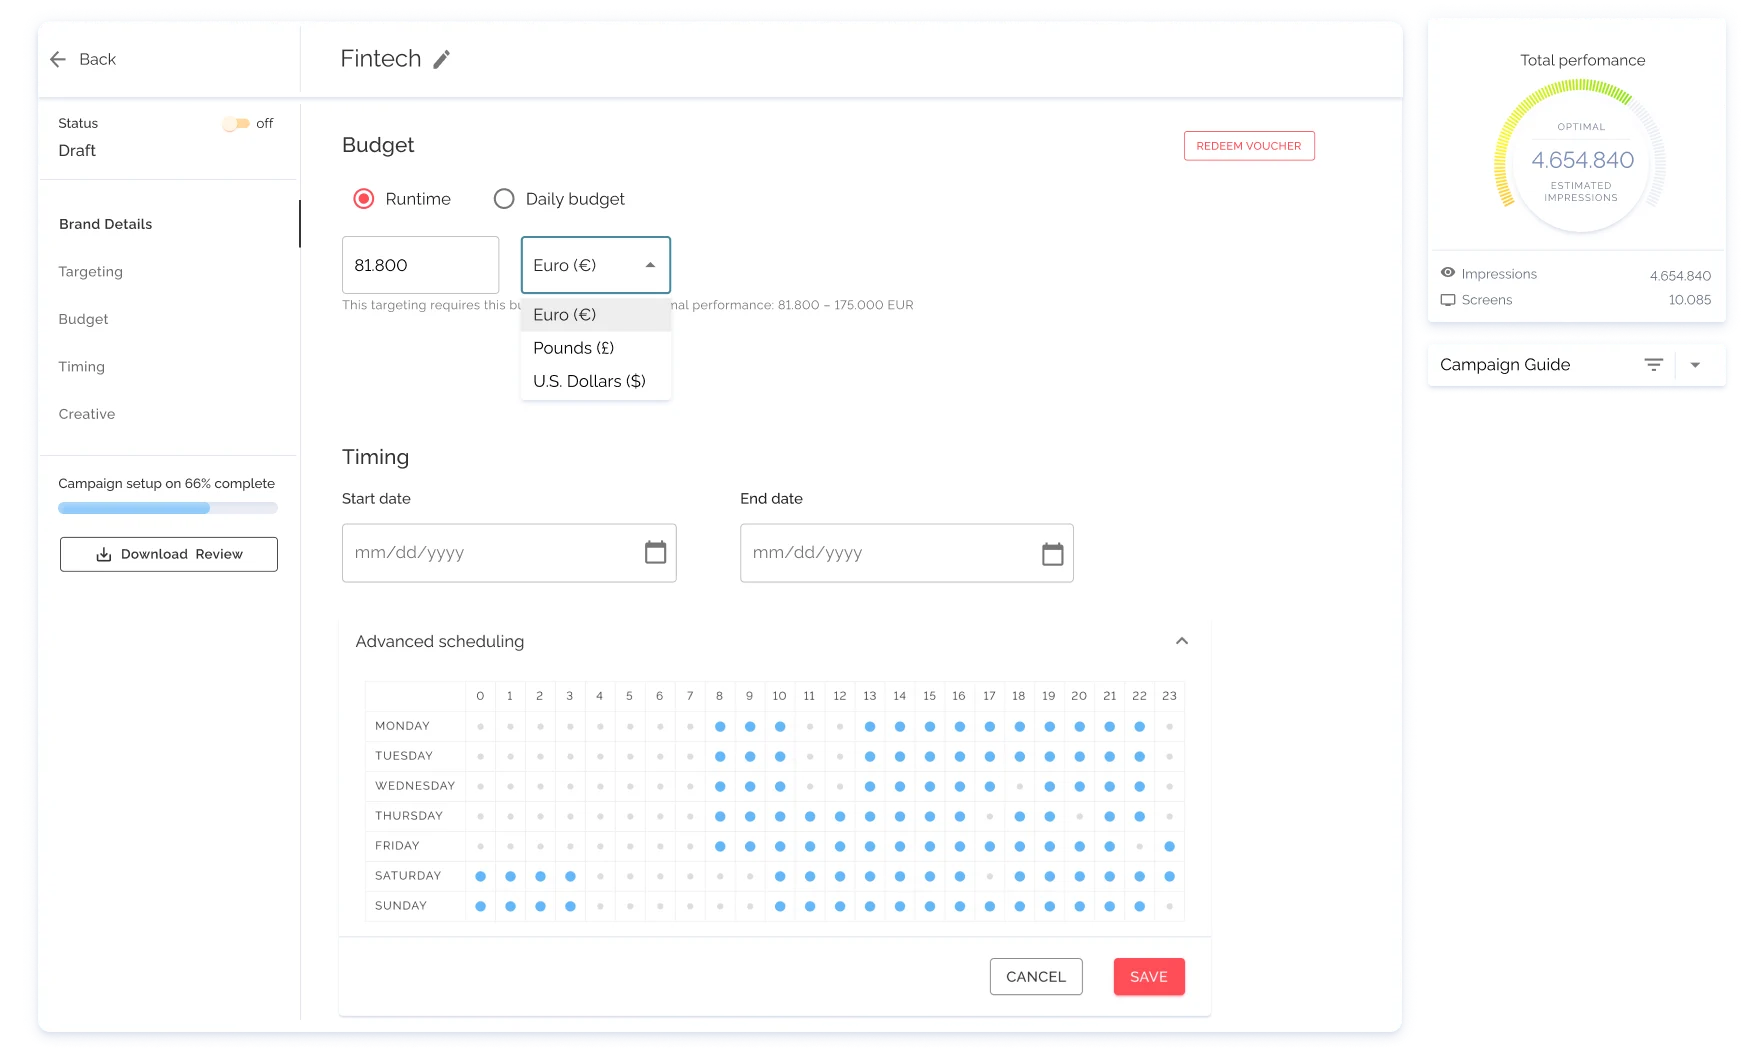
Budget
Start your campaign with as little as £10/€10.The benefits of a campaign budget are that it helps you better allocate your marketing budget, control your ad delivery, and measure your ad performance.
If you’re not sure how much you’re willing to spend on a campaign, don't worry - let the performance indicator guide you to your optimal budget.
If the indicator says you’re overpaying, then it means the budget you have selected is too high, you can choose to broaden your targeting specifications, increase the time period for your campaign or simply reduce your budget.
If the indicator says you’re underpaying, then it means the budget you have selected is too low, you can choose to narrow down your targeting specifications, reduce the time period for your campaign or simply increase your budget.
The budget amount you enter will help determine the number of screens or impressions your campaign would receive. There are two ways of managing your budget:
- Daily budget - spend per day.
- Runtime budget - spend throughout the lifetime of your campaign.
Time & date
Let’s say your audience is more receptive, open-minded and ready to be captivated during certain times. Restaurant chains or food brands could choose to showcase their ads in coworking spaces, and specify the run times pre-lunch (10-2pm) and pre-dinner (4-7pm) but choose not to run the ad in coworking spaces on weekends as they are closed.
Date
- Select a start date and end date from the calendar for your campaign.
Timing
- To enter a daily schedule, click on Advanced scheduling.
- Choose from the Timezone dropdown.
- Select the time period and days of the week you want your ad displayed.
- Click on the first cell to select/unselect all the times and days of the week.
- Click on a day to select/unselect the whole day of a week.
- Click on a time to select/unselect a time for the full week.
- Click on the cell to select/unselect it.
- Hit Save.
Creatives
Upload your high-quality creatives for your campaign, and don’t forget to include a way for your audience to connect with you, like a QR code or short link. Here’s how to upload your creatives:
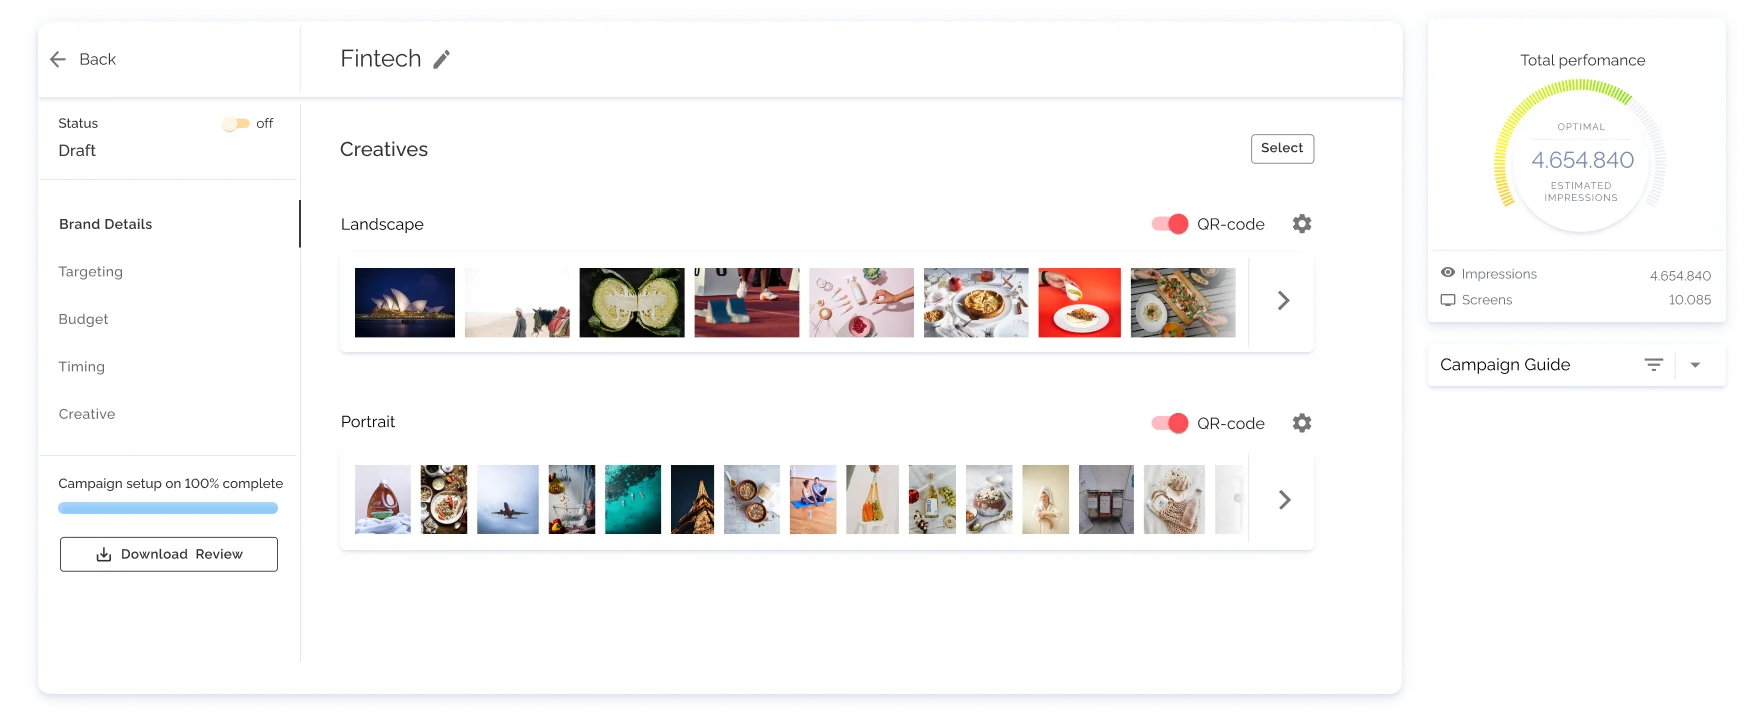
- Under the Creatives section, click on Select.
- You can display an existing creative asset in your gallery, or if you don’t have any saved in your gallery, then select the Uploadtab.
- Drag and drop a creative asset or select one from your device.
- Click on Upload and Save.
To ensure the best performance and highest quality for your campaign, we recommend you follow these specs for your creative assets.
- Image formats: FHD, JPEG, PNG.
- Maximum image size: 10 MB.
- Video format: MP4.
- Maximum video size: 200 MB at 12.5 Mbps.
- The video should not contain any audio, and the duration of the video should be between 10 to 20 seconds.
- For optimal compatibility, creative should be 1920 x 1080px or 1080 x 1920px.
Forecasted performance
Before you go live with your campaign, you can view your forecasted metrics through the performance indicator.
- Impressions - estimated number of views generated. This is dependent on the audience, price of the targeted screens and budget.*
- Number of screens - approximate number of screens your campaign will be displayed on. Every venue has the full rights to approve or reject any ad content uploaded.
Change your budget or run time to see how the impressions and number of screens differ.
Campaign review & activation
Review
As a best practice, it’s always good to review your campaign details before activating your ad.
- Under Forecasted campaign performance, you’ll see suggestions to optimise your campaign. Comments marked in red have to be adjusted to publish a campaign, whereas comments marked in blue are just suggestions to optimise your ad.
- Monitor the progress of your campaign through the progress bar.
- Under the Campaign setup, click on the Review button to download an overview of your campaign.
Campaign Activation
Here’s how you go live with your campaign:
- Once you have filled in and reviewed all details, click on the orange toggle button.
- Accept the terms and conditions.
- The status of your campaign will be moved from Draft to Pending.
- It takes up to 48 hours for your campaign to move from Pendingto Accepted.
So, what are you waiting for? Start your ad campaign today and see the amazing results for yourself. FRAMEN Ads Manager makes it easy to get started – just follow our step-by-step guide. And if you need any help along the way, don’t hesitate to reach out to us. We’re always happy to assist our clients in creating successful campaigns that drive traffic and sales.